Concurrency & Multithreading: ARC, GCD
Michael Lin
Table of Contents
Initialization
Initialization is the process of preparing an instance of a class, struct, or enum for use. This is the reason why we can’t access self inside the closures for initializing our UI components - because the closure is called during phase 1 of the initialization (more on this later), the instance self is simply not ready yet.
var nameLabel: UILabel = {
    let label = UILabel()

    self.addSubview(label) // Error

    return label
}()
In this section, we will dive into some details about initialization in Swift.
Initializers in Value Type
First, we will look at initializers in struct. They are usually simpler due to the lack of inheritance. Suppose we have a struct named Course
struct Course {
    var name: String

    init(name: String) {
        self.name = name
    }
}
The initializer, marked with init, takes a name from the caller and use that as the value of its property.
Then, to construct an new instance using the initializer
let course = Course(
    name: "Introduction to Mathematic Maturity",
)
This brings us the first rule of initialization: an initializer must initialize all of its stored properties.
That is unless the property has a default value or is optional. For example, the following code is also valid.
struct Course {
    var name: String
    var code: String = "CS 70"
    var professor: String?

    init(name: String) {
        self.name = name
    }
}
Initializers in Reference Type
Initialization for reference type (a.k.a class), however, is much more complex. The obvious issue is, with the addition of class inheritance, we may no longer have a single initializer that initializes every property of that class, as some of them might be defined in the superclass. In that case, the superclass should be in charge of initializing those properties. This is known as initializer delegation.
To achieve this while maintaining customizability, Swift introduces two types of initializers for class type: designated initializers and convenience initializers.
Designated and Convenience Initializers
Designated initializers are the main initializers for the class. It has two responsibilities:
- Initialize all properties introduced by the current class, and
- delegate the rest of the initialization to a superclass designated initializer
This ensures that all the properties get their starting value after calling the initializer.
Convenience initializers, on the other hand, are secondary, supporting initializers for a class. A convenience initializer must eventually call a designated initializer from the same class. They provide further customization when initializing the class.
Conceptually, here is an example of a initialization chain in terms of designated and convenience initializers.

To put this together in code, here we have a class Person, and a subclass Student which inherit from Person. The two initializers, marked only with init, are designated initializers.
class Person {
    var id: String
    var name: String

    init(id: String, name: String) {
        self.id = id
        self.name = name
    }
}

class Student: Person {
    /**
    *  1 - Freshman, 2 - Sophomore, 3 - Junior, 4 - Senior
    */
    var year: Int

    init(withID id: String, name: String, year: Int) {
        self.year = year
        super.init(id: id, name: name)
    }
}
Note that in the Student initializer we need to initialize self.year before calling its superclass initializer.
Then we realize it would be nice if our initializers can accept year as string as well. We can easily achieve this using a convenience initializer.
extension Student {
    convenience init(withID id: String, name: String, year: String) {
        var yearNum = -1
        switch year {
        case "Freshman": yearNum = 1
        case "Sophomore": yearNum = 2
        case "Junior": yearNum = 3
        case "Senior": yearNum = 4
        default: yearNum = -1
        }

        self.init(withID: id, name: name, year: yearNum)
    }
}
Notice that we are not wasting any code here. We are calling self.init with the integer year as if it was passed down from the caller. The only thing new is the logic that converts year from a string to integer.
Two-Phase Initialization
Now, because as we saw properties are initialized in different places depending on where they were defined, certain rules are needed in order to prevent them from being accessed before they are initialized. Swift does this by following a two-phase initialization process. In the first phase, Swift works its way up the initializers chain and initializes every stored property. After that’s done, in the second phase, the program returns back from the top of the chain, and each initializer is given the opportunity to customize its stored properties even further before the instance is returned.
This dictates where the superclass can be called, and when we can read or write to a certain properties.
init(withID id: String, name: String, year: Int) {
    /* First Phase Start */
    self.year = year
    super.init(id: id, name: name)

    /* Second Phase Start*/
}

convenience init?(withID id: String, name: String, year: String) {
    /* First Phase Start*/
    guard let year = Year(rawValue: year.lowercased()) else { return nil }
    guard let yearNum = Year.allCases.lastIndex(of: year) else { return nil }

    self.init(withID: id, name: name, year: yearNum)
    /* Second Phase Start*/
}
There are much more details about two phase init than what we can cover. But for us, the biggest difference between the two phases is the availability of self. In the first phase, the use of self is very limited, and can only be used inside the designated initializers to assign value to a stored property introduced in the class. For example, the following use of self is not allowed even if it might seem harmless.
convenience init?(withID id: String, name: String, year: String) {
    /* ... */
    self.year = yearNum
    self.init(withID: id, name: name, year: yearNum)
}
In the second phase, these restrictions are removed and you can alter property values and even call instance methods using self.
By doing so, we can prevent property values from being used before they are initialized, while still giving flexibility to the initialization process.
Automatic Reference Counting
You can think of Automatic Reference Counting (ARC) as the garbage collector in Swift. It is a framework used to track and manage the memory of your app.
As you may already know by now, classes in Swift are passed by reference. That means when you initialize a class instance, the runtime allocates a chunk of memory in a special location known as heap, and returns to you a reference pointing to that chunk of memory. You can duplicate or move or pass that pointer around any way you like, but the physical instance of the class is always going to be in the same location in memory. This helps keep passing class instances lightweight as it only involves copying the pointers.
However, when the instance is no longer being used it needs to be released from memory. Otherwise they would slowly build up until our memory is full. In lower level programming language such as C, this needs to be done manually by explicitly calling some special functions. But that can cause a lot of pain as we will need to keep track of every instance we create (You will learn more about this in 61C).
Therefore, modern languages like Java and Go use a GC (Garbage Collection) runtime to automatically detect and destroy instance that are no longer usable. But they come with a much higher memory and performance overhead.
ARC is somewhere in between. It’s not as memory/performance intensive as GC, and yet it still clean up unusable memory with the exception of retain cycle (explained later). It works by tracking the number of pointers referencing an object, and mark the object for deallocation when the count reaches zero.
Reference Cycle
As we mentioned, this lightweight solution has a draw back. Consider the following classes
class Foo {
    var bar: Bar?
    init() { self.bar = Bar(foo: self) }
}

class Bar {
    var foo: Foo
    init(foo: Foo) { self.foo = foo }
}

var foo: Foo? = Foo()
foo = nil
The variable bar is declared as optional because it has to be initialized in phase two rather than phase one.
You will notice that once initialized, foo holds a reference to a Bar instance, which also has a reference to foo. Then when we discard the reference to foo by saying foo = nil, the Foo and Bar instances will still have one reference pointing to each other. As a result, they will never be collected by the ARC despite that there’s technically no way for us to use the two instances anymore. This is known as a reference cycle.
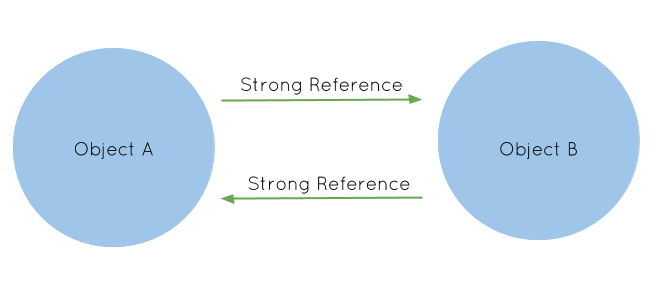
Strong and Weak References
So how do we solve this? Fortunately, it is relatively straightforward, we just have to be careful. It turns out that there are two kinds of references: strong references and weak references, and the ARC only cares about the strong references. That is, when it counts, it only counts the strong references to determine whether to deallocate an instance. Variables use strong references by default, and we need to explicitly declare them using the weak keyword if we are going to use weak references.
class Foo {
    var bar: Bar?
    init() { self.bar = Bar(foo: self) }
}

class Bar {
    weak var foo: Foo?
    init(foo: Foo) { self.foo = foo }
}

var foo: Foo? = Foo()
foo = nil
When we run foo = nil, the instance foo will have zero strong reference, so it will be deallocated first. After that, without the bar variable in foo pointing to bar, the bar instance will also have zero strong reference, causing it to be collected as well.
However, there is one little side effect: because the variable using weak reference can not guarantee to be pointing to a valid instance, it has to be declared as an optional.
Grand Central Dispatch
Everything we’ve learned so far is executed linearly in a place known as the main thread. The name thread comes from the fact that instructions are lined up to be executed one by one, and the previous line has to finish first in order for the program to move on to the next line. This is oftentimes preferable as our next line may be dependent on the results of the previous lines.
The main thread is used for all UI updates such as the scrolling effect of the collection view in Pokédex.
However, if an instruction takes too long to execute, the entire thread would just freeze. This is known as blocking. Blocking can be a big issue when you are executing an expensive operation or during a network request. Since these operations may take a long time to finish, if we do it on the main thread, our UI would become completely unresponsive during that time.
guard let url = URL(string: "image_source_url") else { return }
guard let data = try? Data(contentsOf: url) else { return }
cell.imageView.image = UIImage(data: data)
If you try this with your collection view cells in Pokédex, you should see your app getting “choppy” when scrolling - they are the effect of fetching data on the main queue.
The solution is GCD (Grand Central Dispatch), a framework that facilitates multithreading in Swift and Objective-C.

In other languages you might’ve learned such as Python or Java, programmers typically have to spawn in and manage these threads themselves. But spawning new threads on the run is expensive, and managing them can be quite tricky and tedious (see this prehistoric doc, they are what you will have to do to parallelize your program in the pre-GCD era). Therefore, the engineers at Apple developed a solution using a centralized dispatch system, and here is a simplified version of how it works:
Instead of spawning the threads ourselves, they are created and managed by the framework. In return, GCD gives us access to two types of globally available dispatch queues: the main queue and the global queues. So whenever we need to run a task, we send it to one of the queues, and it will then dispatch it to the appropriate threads. You can create your own dispatch queue if you want, but we will not get into that in the training program.
Main Dispatch Queue
The main dispatch queue is a globally available serial queue that executes tasks on the application’s main thread. It is a serial queue, meaning that all tasks will be executed in the order which they were added to the queue. This is where all of our code is executed by default. All UI-related code must happen on this thread, so as we said, you want to be careful not to block your main queue with time-expensive tasks. You can access the main queue using DispatchQueue.main.
Global Dispatch Queues
Unlike the main queue which is backed by only one queue and one thread, there’re four built-in global queues available to use, and each of them manages a pool of threads. Global queues are concurrent queues, meaning that even though tasks are still started in the order in which they were added to the queue, the queue can execute multiple tasks at once.
The four predefined global queues are identified by their Quality of Service (QoS), and can be accessed by calling DispatchQueue.global(qos:). GCD uses QoS to adjust tasks priority and maintains a balance between performance and energy efficiency. The four QoS identifiers are:
.userInteractive: Tasks related to interacting with the user, such as operating on the main thread or refreshing the UI. If the operation doesn’t happen quickly, the user interface may appear frozen. This QoS class has the highest priority among the four..userInitiated: Tasks that the user initiated and requires immediate results, such as opening a saved document. Tasks in.userInteractiveand.userInitiatedshould always be almost instantaneous..utility: Tasks that may take some time to complete (a few seconds to a few minutes). An example would be downloading data from a remote source..background: Tasks that operate in the background and aren’t visible to the user, such as indexing, synchronizing, and backups.
Async vs. Sync
When sending tasks to a dispatch queue, you can choose whether the tasks are executed synchronously or asynchronously. Asynchronous task will not block program execution at the call site. In other word, the caller does not wait for the async task to return. Crucially, this is not to be confused with the blocking effect on the main thread. Async or sync have almost no effect on the queue actually executing the task, it only impact the caller and its transfer of control. A task sent to the main queue will still block even though it’s async.
This video will walk you through the difference between sync and async using an example of loading a UIImage